I am beyond excited to introduce my friend Eleanor Hains Rodway. Eleanor is an over all creative master mind and the writer/ blogger for TahTah makeup.
She is über wife to handsome Jamie and loving Mama to sweet baby Max. Oh and yes, I enter into evidence, that indeed a girl can have it all. . . my girl E is the real PIMPIN deal!

Hi everyone! It's so nice to be here! Thanks to @sweethomecharlotte for inviting me over to play. Blogging about make-up is an absolute blast but once in a while I like to break away from the norm and change things up. I must preface this with the disclaimer that I am in no way an expert designer. I seek most of my designing advice from @sweethomecharlotte. She tolerates my questions and always helps me make decisions. I love a project though. Big or small I'm always excited to tackle something new. I don't always get the most desired result but every once in a while I pull out a winner. This my friends was a winner.
It started with a lone fabric swatch from Tony's in Huntersville. If you haven't been there you need to go - loads of fabric all on the cheap.
Anyways - fabric swatch inspiration
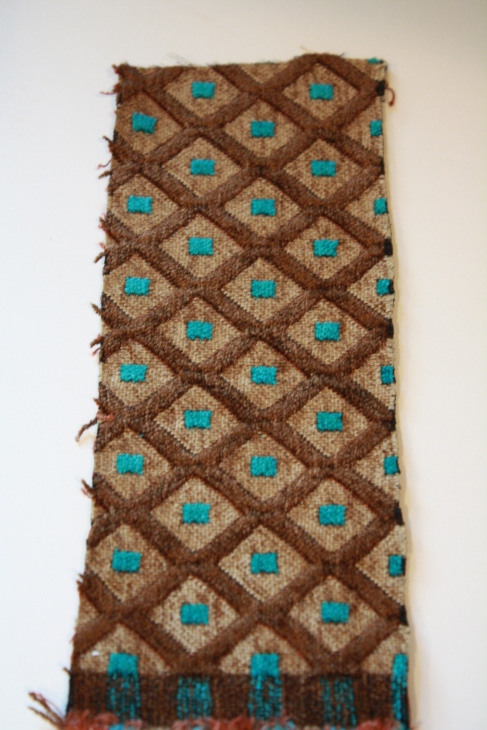
I decided to use it to recover my dining room chairs. My dining room and living room are a combo area. I've been wanting to do a little upgrade to the space for a while now.
I
(1) We've got some really nice leather chairs that we paid a premium for - I basically blew an entire
(2) We have some nice family heirloom pieces in the room that are OFF LIMITS when it comes to moving, painting etc.
(3) My husband would kill me if I spent more money on furniture.
So trying to keep it simple and cheap I aim to put lipstick on the proverbial pig (totally kidding I LOVE my living room space)
But a little fabric and paint goes a long way. So with my reuphosltery project on the to do list....progress shown below

Errr moving right along aren't we?
I'm a tornado when it comes to DIY I like to plan and then do it ALL at once so I needed more on my living room updo to do list (can you say that three times fast?)
I opted for a side table project. I've been wanting a new side table to go in between the two leather chairs. I was thinking old Hollywood glam, maybe a brass nailhead trim table or something like this
[caption id="attachment_1116" align="aligncenter" width="300" caption="Click for Photo Credit"]
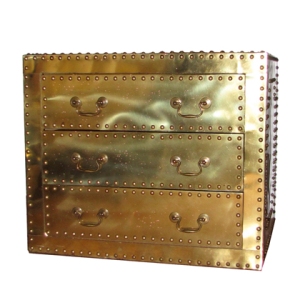 [/caption]
Please refer to reason 3 from above as to why this never happened.
So I went to plan B. I discovered this website on one of my design blogs not to long ago - www.myoverlays.com Upon my discovery I realized that I could do a fancy side table at a fraction of the cost thanks to the overlays and thus a new project was born.
I started with the Ikea Rast side table

These things are super cheap at Ikea - $34.99. They aren't solid oak or anything but I would say fairly sturdy. I mean ultimately you get what you pay for at Ikea but again it wasn't being held together by glue. A good solid accent piece in my opinion. So to begin with I primed both the drawers and the actual piece.
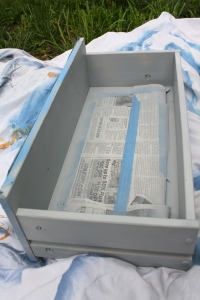

I covered the front and the inside of the drawers with newspaper and then primed them in a grey primer and spray painted them gold. This way when you open them up the sides are gold and the inside is gold. My plan is with the leftover fabric from the chairs to line the inside of the drawers with it. Choosing a color was the hard part. I'd taken the fabric swatch to Lowe's to have them try and match it. Then I tried to pick colors just eyeballing the fabric
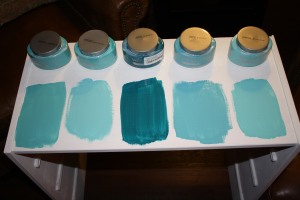
The dark one in the dead center is what Lowe's pulled from the swatch. I think it's pretty funny how my "eyeballing" didn't even come close to what Lowe's pulled. Although in my defense the browns from the fabric pulled through on the custom color hence it being so dark. It ended up working out perfectly because we have dark furniture. So we chose the custom color. Completed drawer with spray painted inside and front looks like so

Sorry the picture is a wee bit dark. Mad Max rarely lets me get stuff accomplished in the daylight hours.
Next I painted the overlays that I purchased. I spray painted them gold as well. This part was super easy. They are very light weight but not so light weight that they fly around when you're painting them.
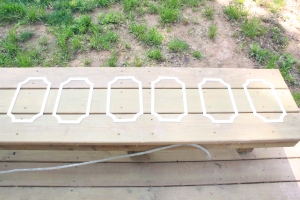

Then came the worst part of all - making sure these suckers lined up EXACTLY. I
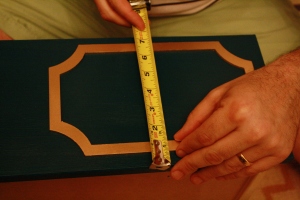
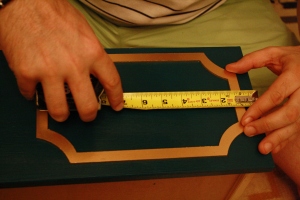
Once we'd gotten them lined up perfectly I marked the drawer while the husband held them in place. Then smeared a little Liquid Nails on the back and stuck it on.
Adding the hardware was the last step. I headed over to Blackhawk with the exact picture in mind of what I wanted.
I ended up with these


Pretty much what I wanted - the glass looking knobs. These are acrylic so pretty close. My only complaint - I wanted a brass or gold base but all they had was silver - or I should say all they had in my price range was silver. They had crystal and glass knobs both with gold or brass bases but the crystal knobs at $23 a pop and the glass knobs at $16 a pop....
Well let's just say I made an executive decision and went with silver and acrylic for $4.
Truthfully I refused to spend $150 on hardware for an Ikea piece and if you once again reference Reason 3 from above it's totally applicable in hardware purchases as well.
And so alas my DIY project was done. Wait for it......
Drumroll please!
TA-DA!
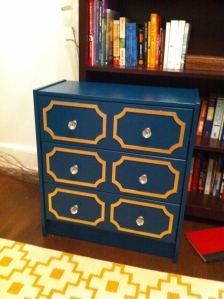
Not too shabby eh?
Breaking it down
Ikea Rast Chest → $34.99
Paint Samples / Spray Paint → $18.00
Quart of custom Paint → $21.00
6 Anne Overlays → $58.60
Hardware → $28.89
That's a total of $161.48! I would say I truly deserve a cookie on this one. All the pieces I had my eye on were well over $500 and that was before shipping.
I mean I think it looks like a million bucks!
Here's a little before and after
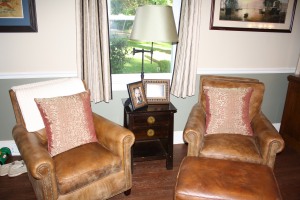
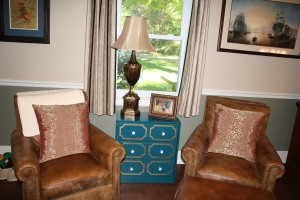
Thanks for having me @sweethomecharlotte!
Now we must discuss a new lamp shade and throw pillow options - I need your opinion :)


So beautiful and inspiring! Love, love, love.
ReplyDeleteNice job!!
ReplyDelete